Selection
Room Selection takes place in the Housing Portal during an individual or group's appointment time.
Room Selection Begins at Your Appointment Time
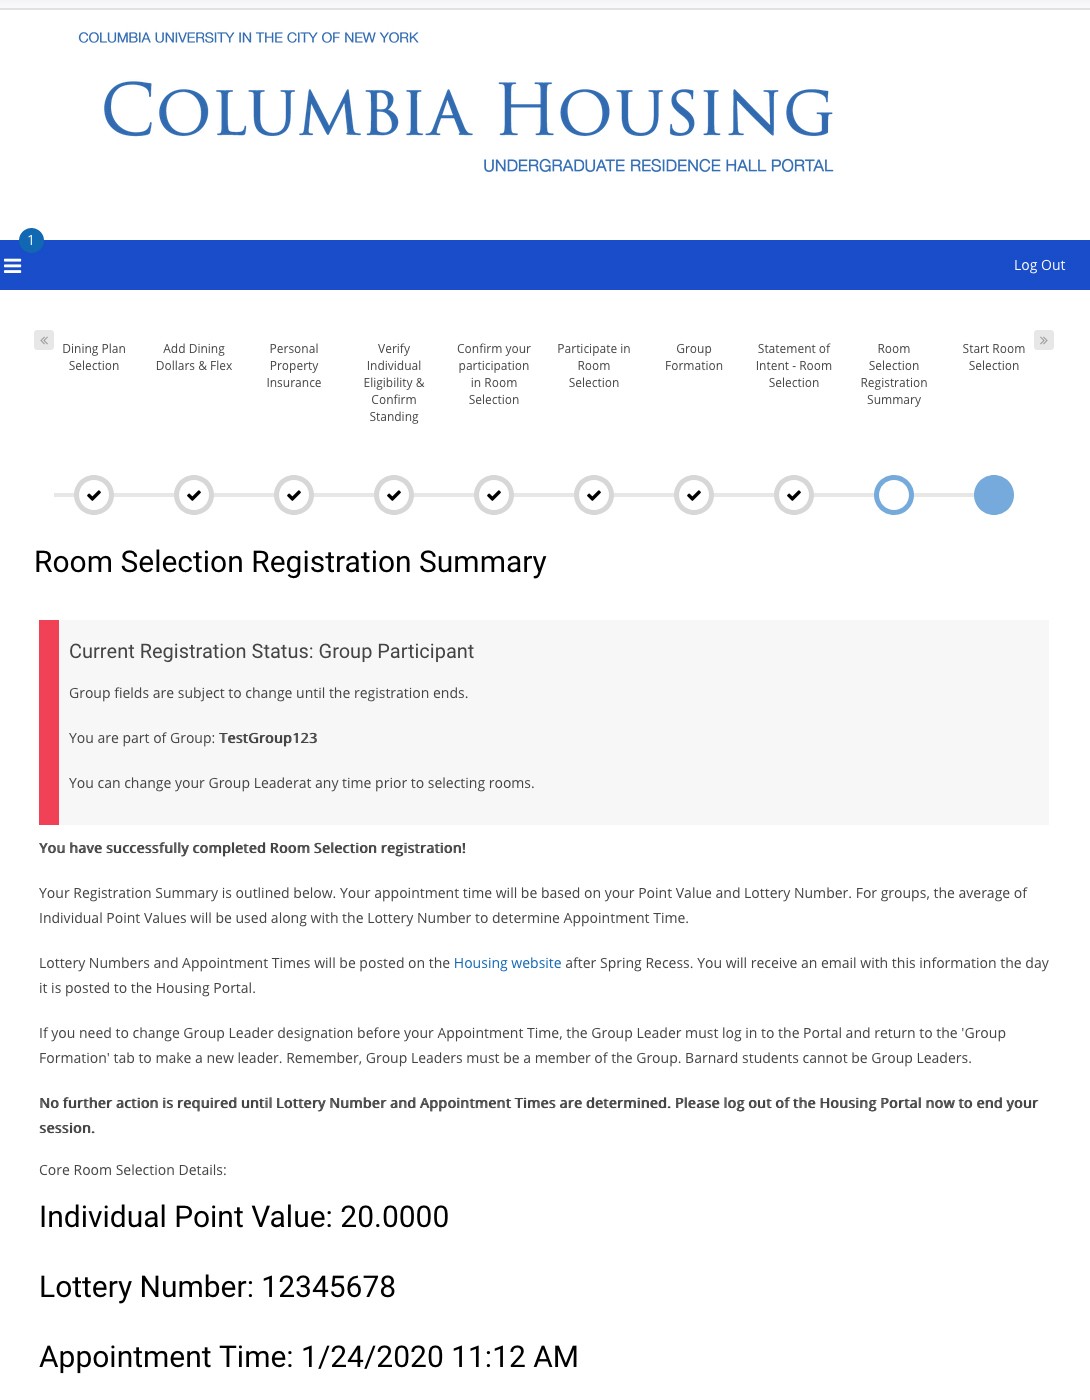
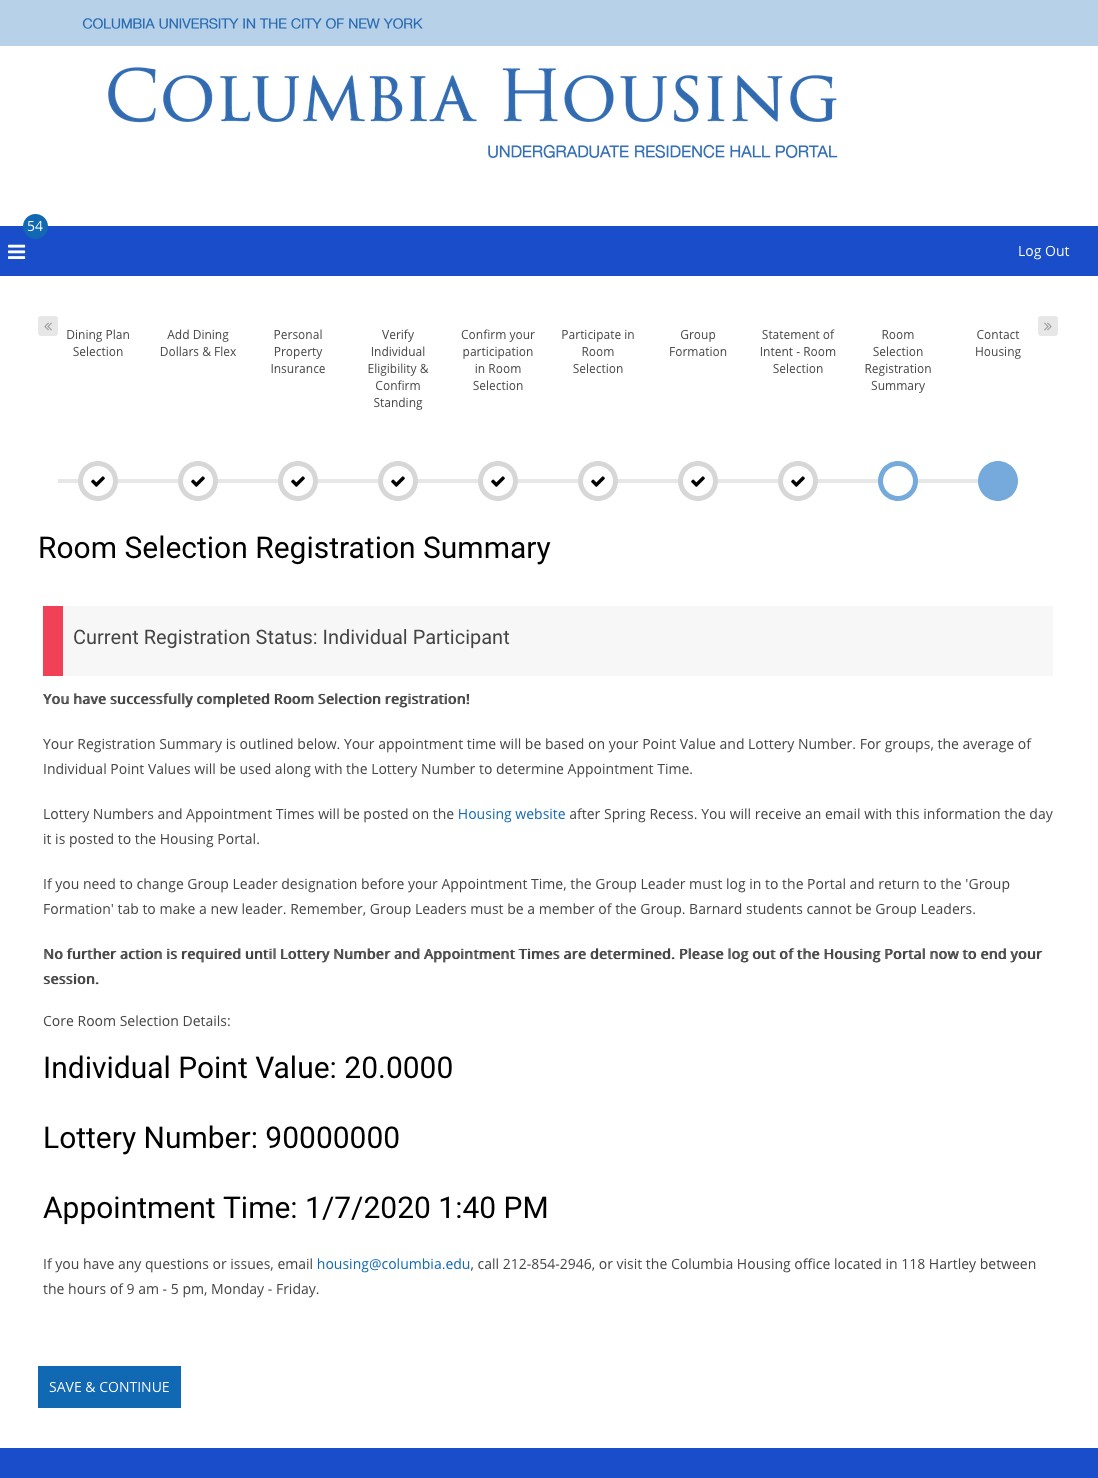
Following Room Selection Registration, students participating in the process as an individual or as part of a group will receive their individual or group point value, individual or group lottery number, and their appointment time..
Step 1: Begin Room Selection
You can begin Room Selection as soon as your appointment time arrives, and complete it anytime between your appointment time and the end of Room Selection.
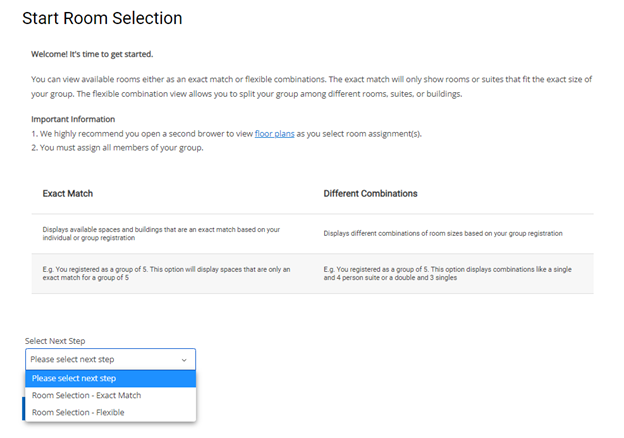
To begin, log into the Housing Portal and return to the Room Selection Application. The Start Room Selection screen will be available to you at your appointment time.
The start page provides you with two options to begin:
- Proceed to Exact Match Selection Options
- Choosing this option will display only those housing options that exactly fit all the members of your group, or you as an individual.
- Choosing this option will display only those housing options that exactly fit all the members of your group, or you as an individual.
- Proceed to Different Combinations Selection Options
- Choosing this option will present all remaining housing options so that you can consider the best fit for you or your group — whether that is choosing a space that fits everyone, or selecting various options to accommodate all group members.
We encourage all Group Leaders and members of groups to familiarize themselves with the Group Selection process prior to their appointment time.
Step 2: Review Available Selection Options
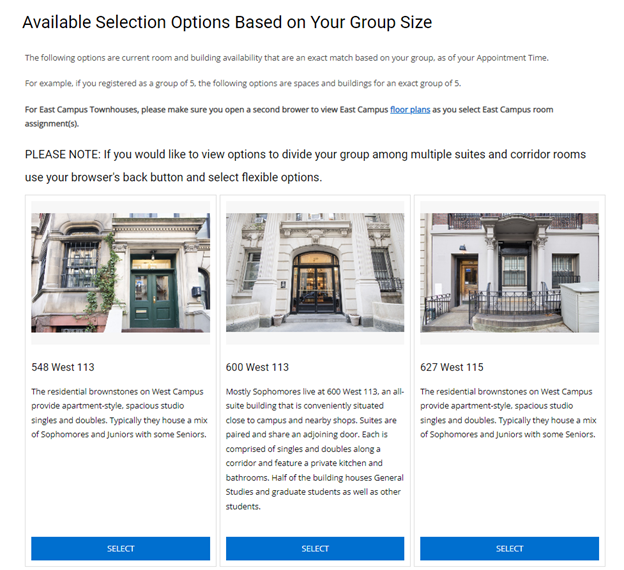
On the next screen, you will be presented with a list of all the residence halls that have options available to fit your group size.
Click on the Select button below a residence hall will display the available rooms within that building.
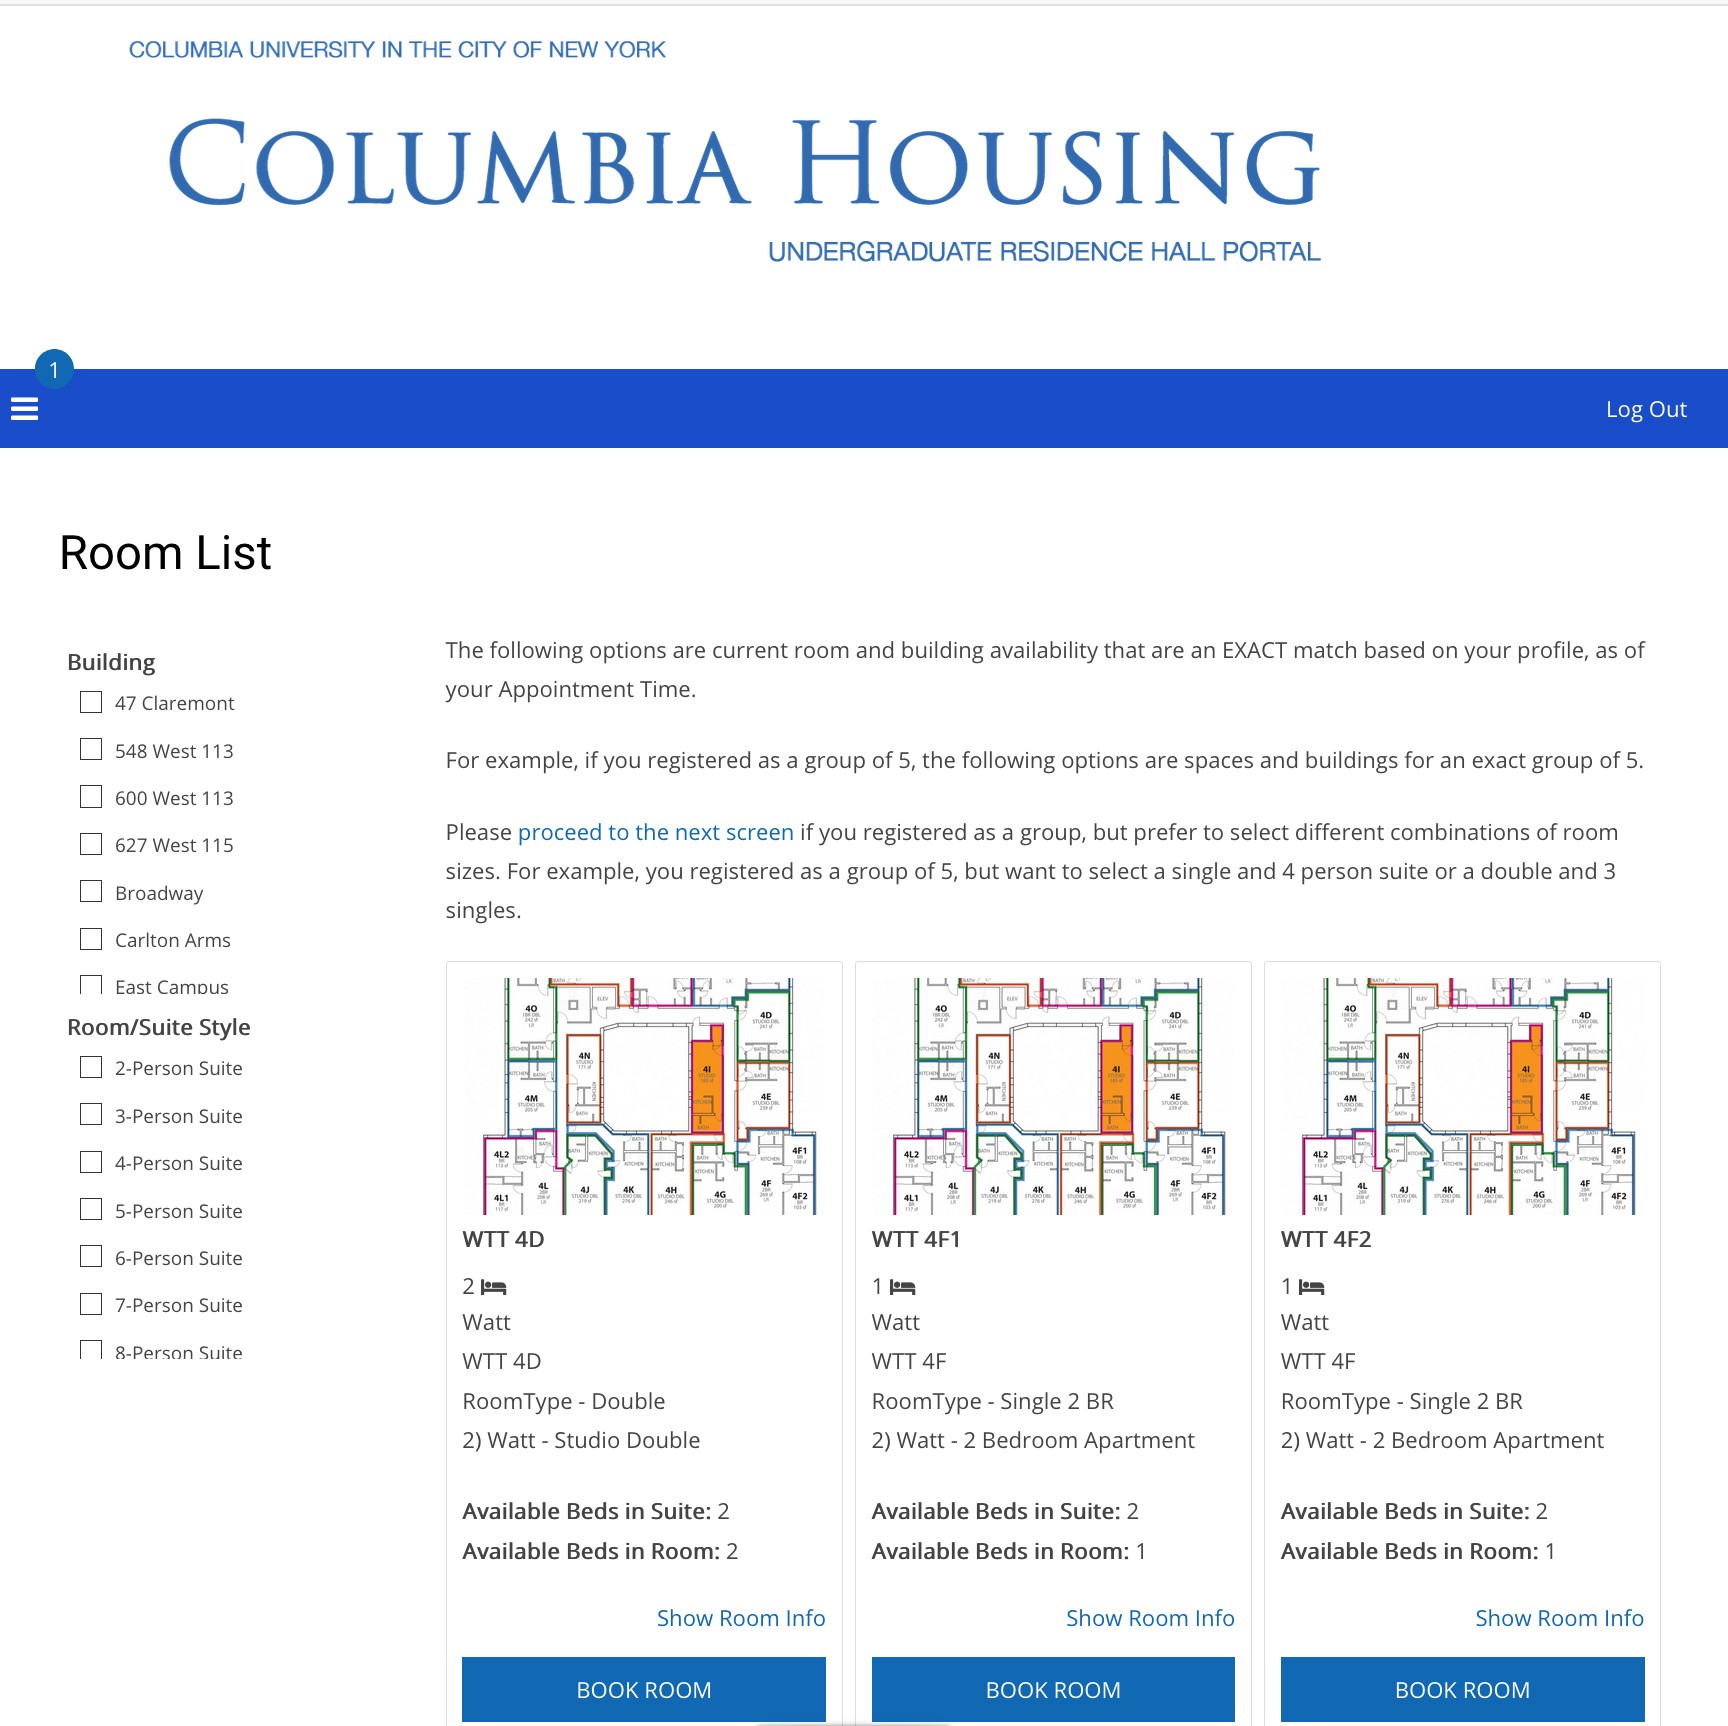
In this example, we see a Room List at Watt Hall showing available rooms that will fit a group of two:
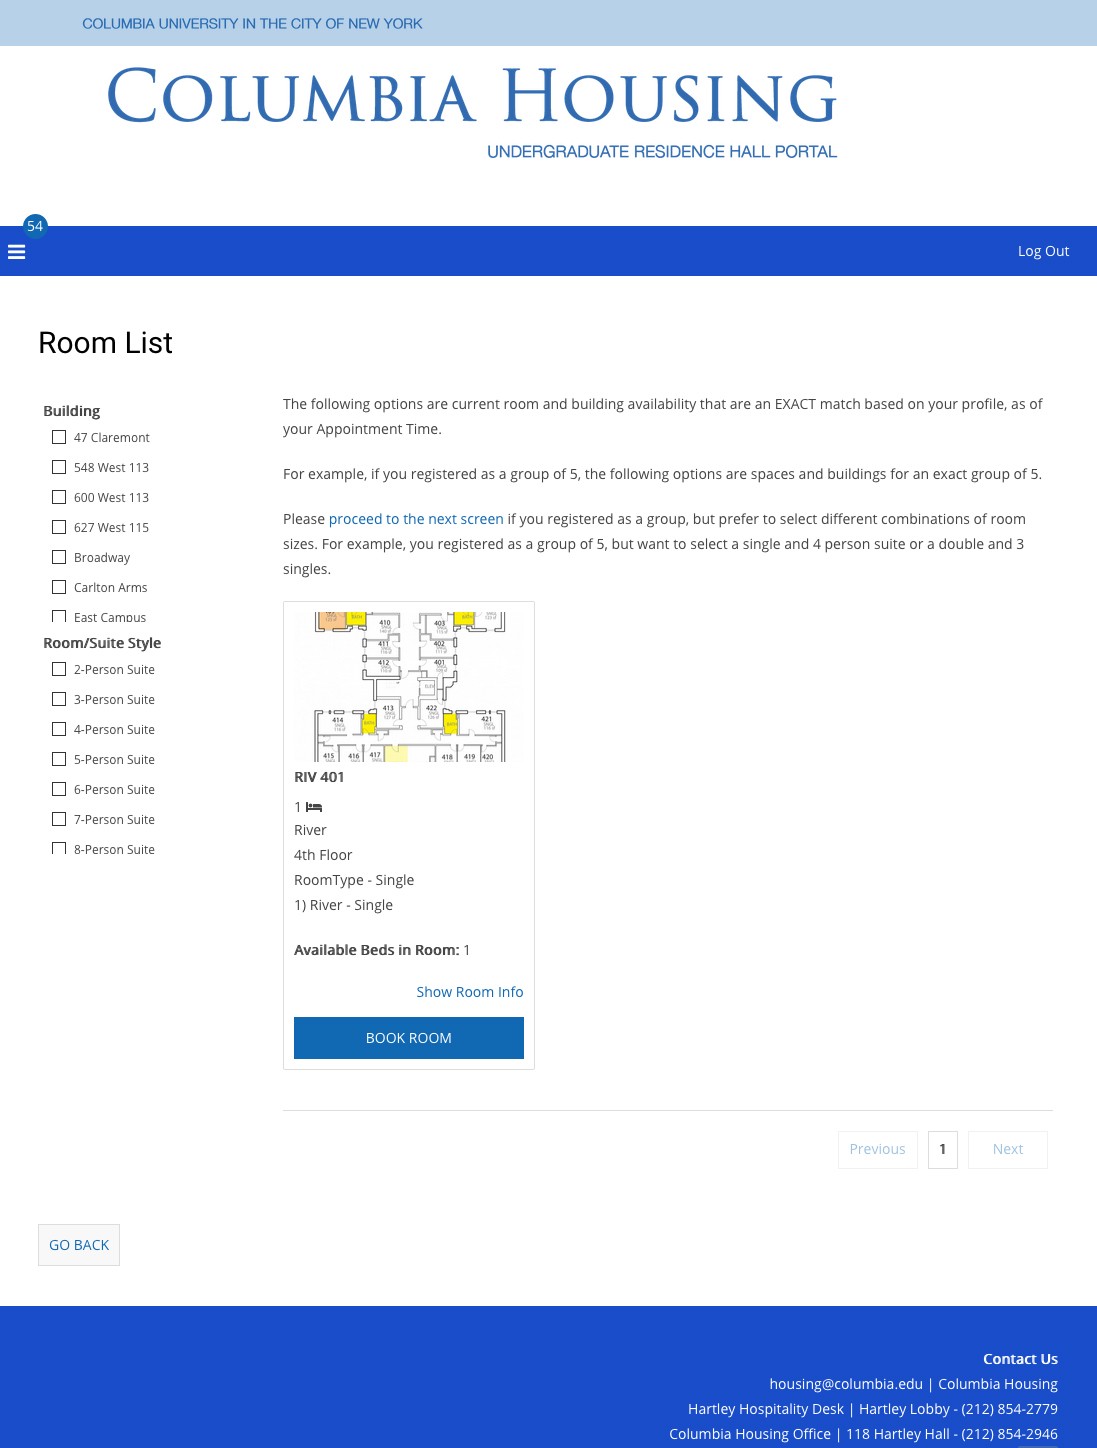
And this example shows the available rooms in River Hall for a student selecting as an individual:
Step 3: Book a Room
Once you have reviewed all options and made your decision, click the Book Room button for the chosen space.
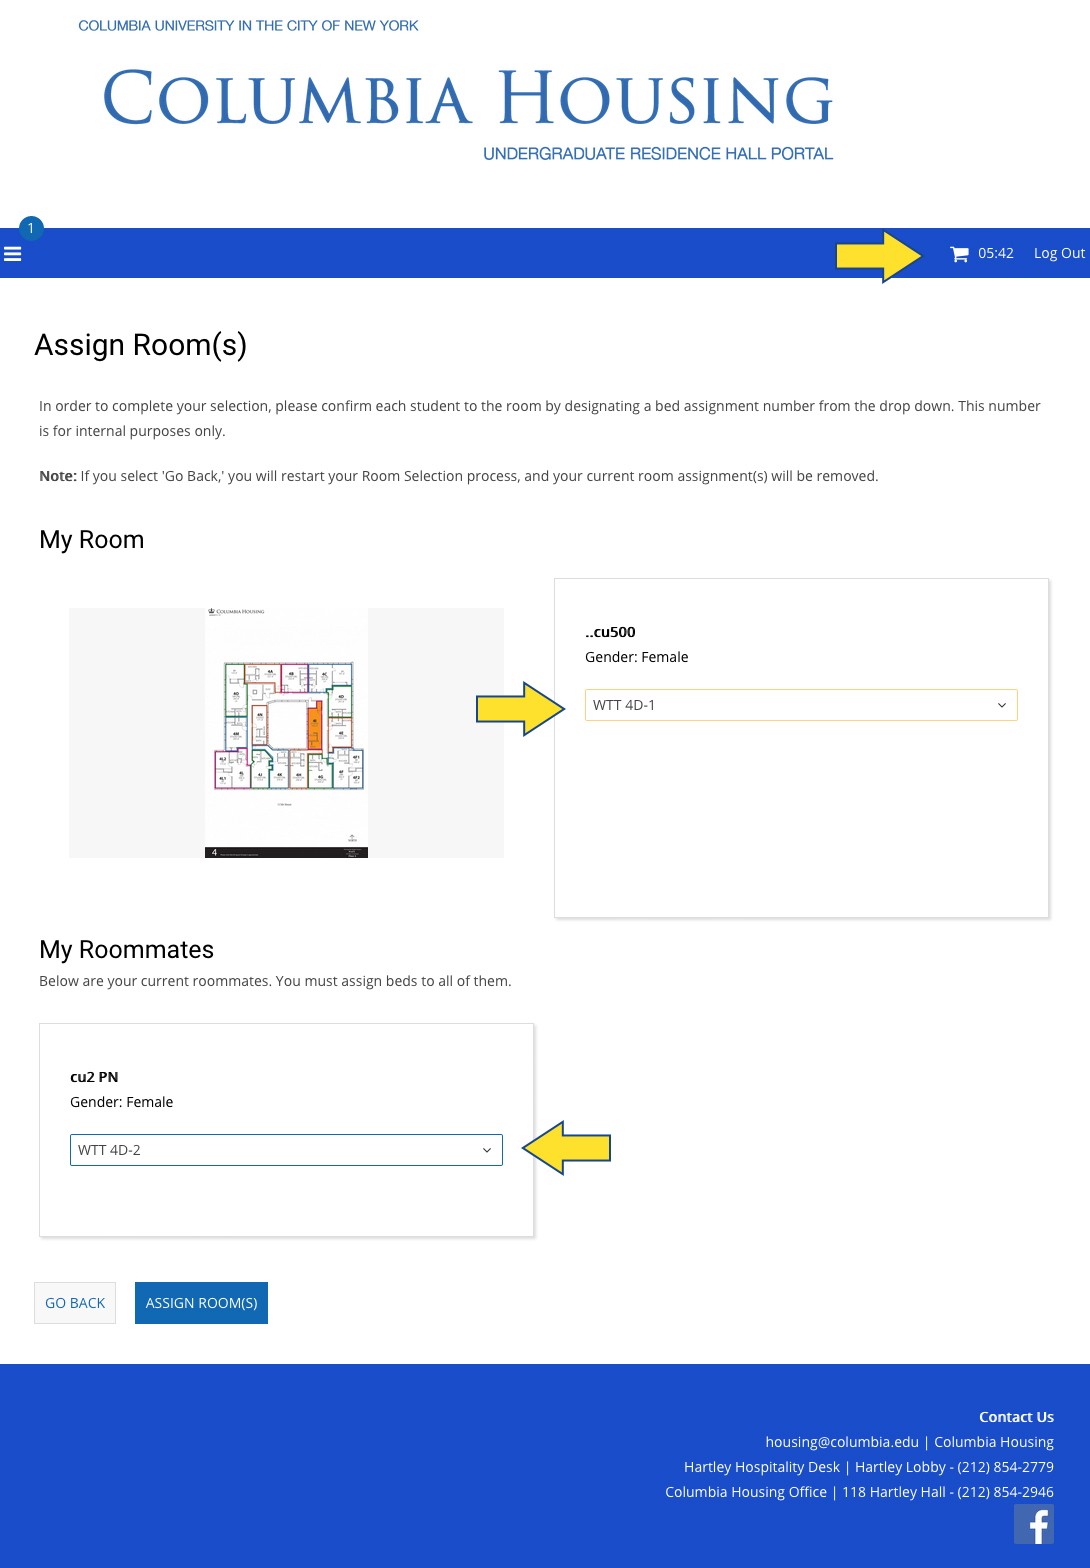
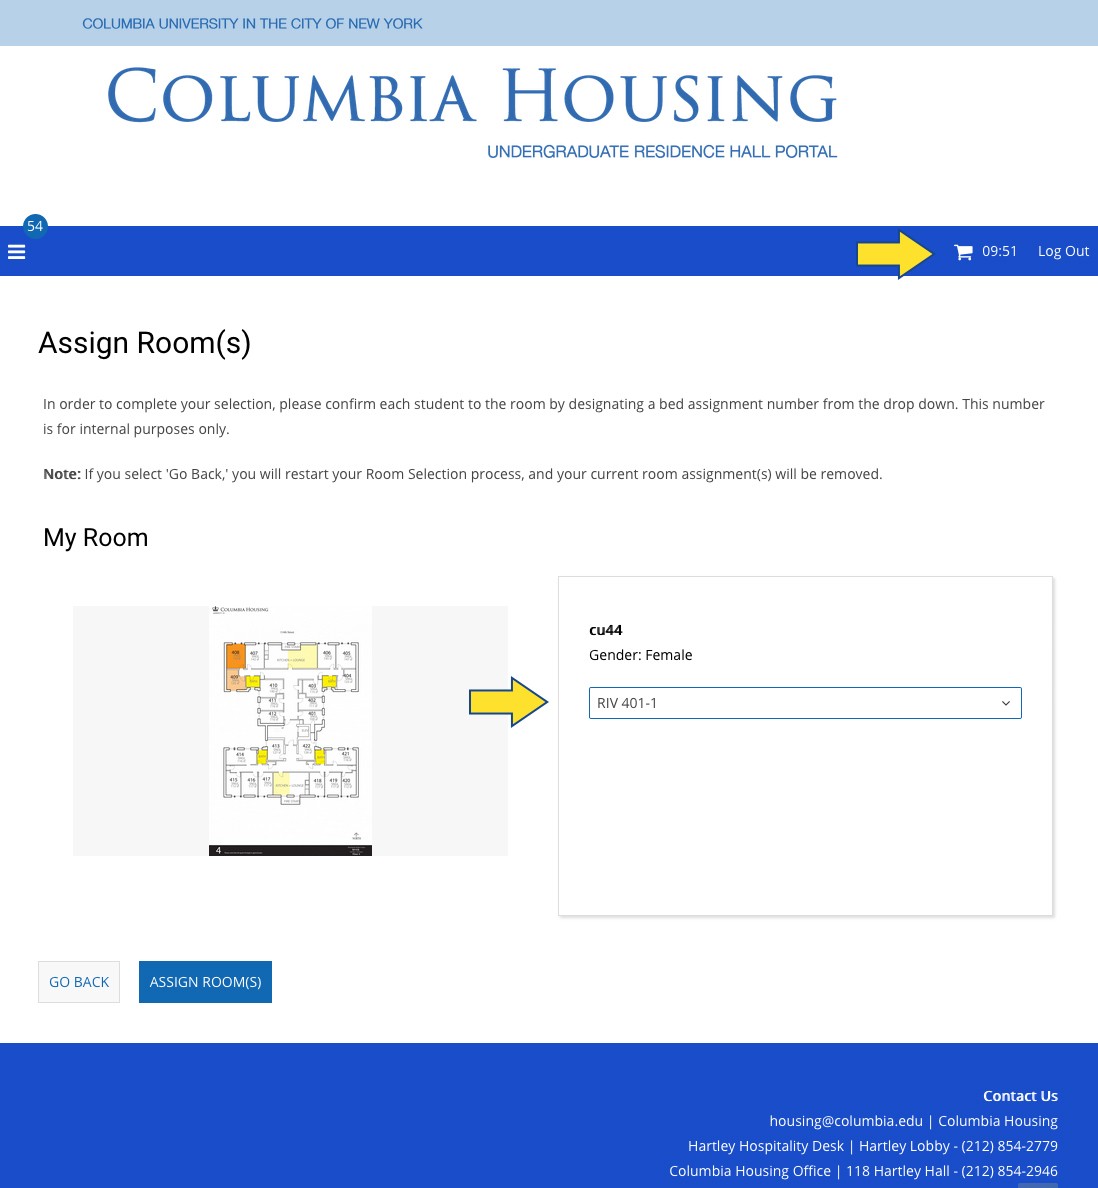
To book the room, choose an available bed and use the drop down menu to assign yourself to the bed if you are selecting as an individual, or assign group members to available beds if you are a Group Leader selecting for your group.
IMPORTANT: Once you are on the Book a Room screen, you will see a timer appear next to a shopping cart in the top right of the screen. This is the amount of time you have to select a bed and save your selection.
The following two screen captures show example of booking a room as a group and as an individual.
Group example:
Individual example:
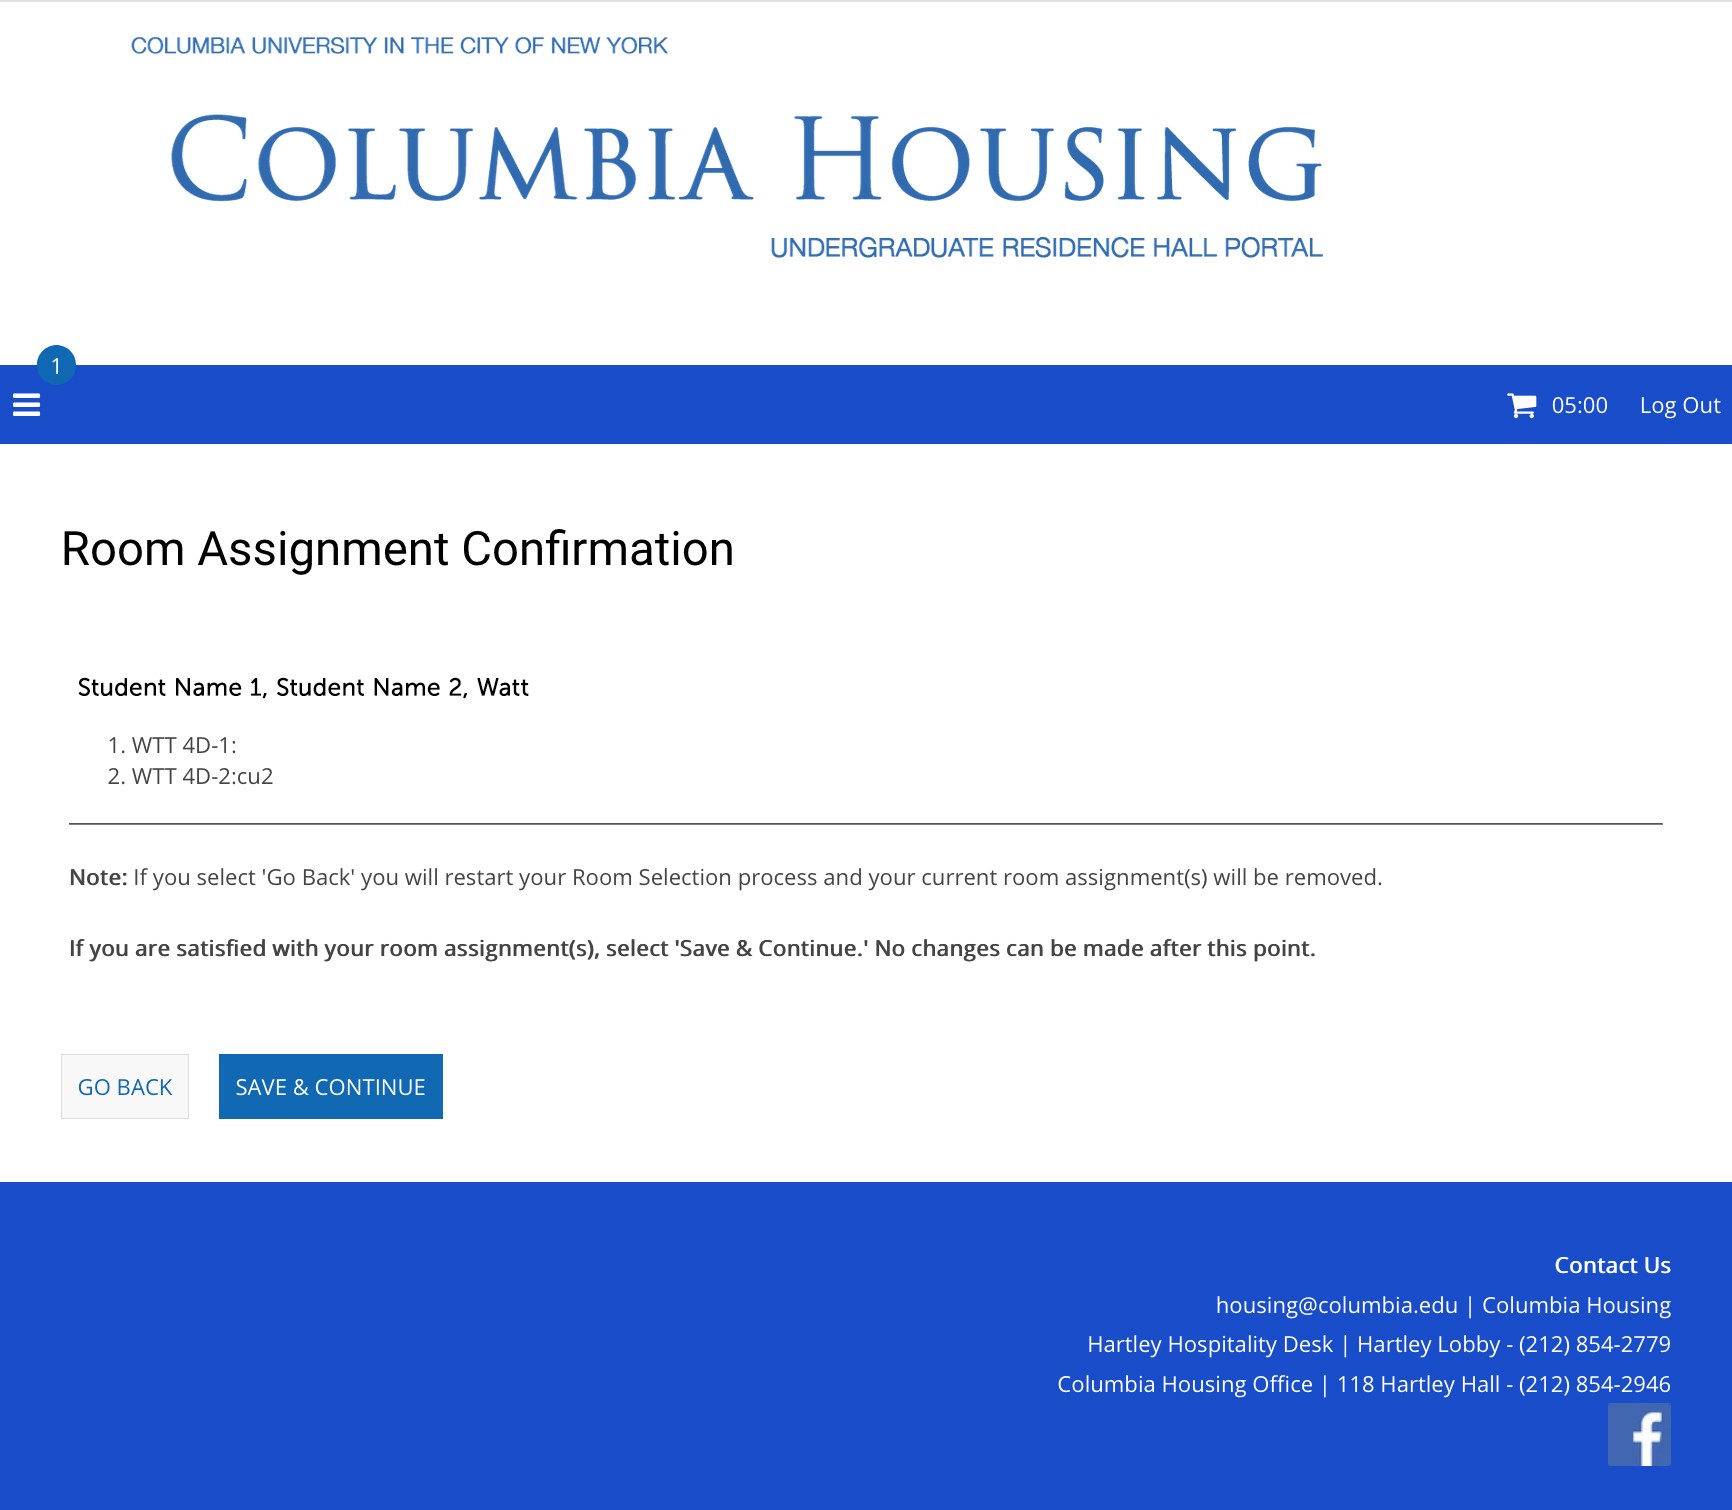
Step 3 (Continued): Room Assignment Confirmation
Once the room is assigned, you will see it confirmed on the next screen. Below is the confirmation example for the group room booking shown in the screen capture above. The individual confirmation will be the same, with the only difference being that it will display the details of the room the individual booked.
- If you are selecting as an individual, clicking Save and Continue will allow you to move on to sign your Occupancy Agreement and complete Room Selection.
- if you are selecting for a group, you will need to repeat steps 2 and 3 until all group members are assigned to beds in rooms, then you will be able to complete the Room Selection process.
Note: Don't forget that even though Group Leaders will perform the actual selection, all group members must log back into the Housing Portal after selection to complete their own Occupancy Agreements.
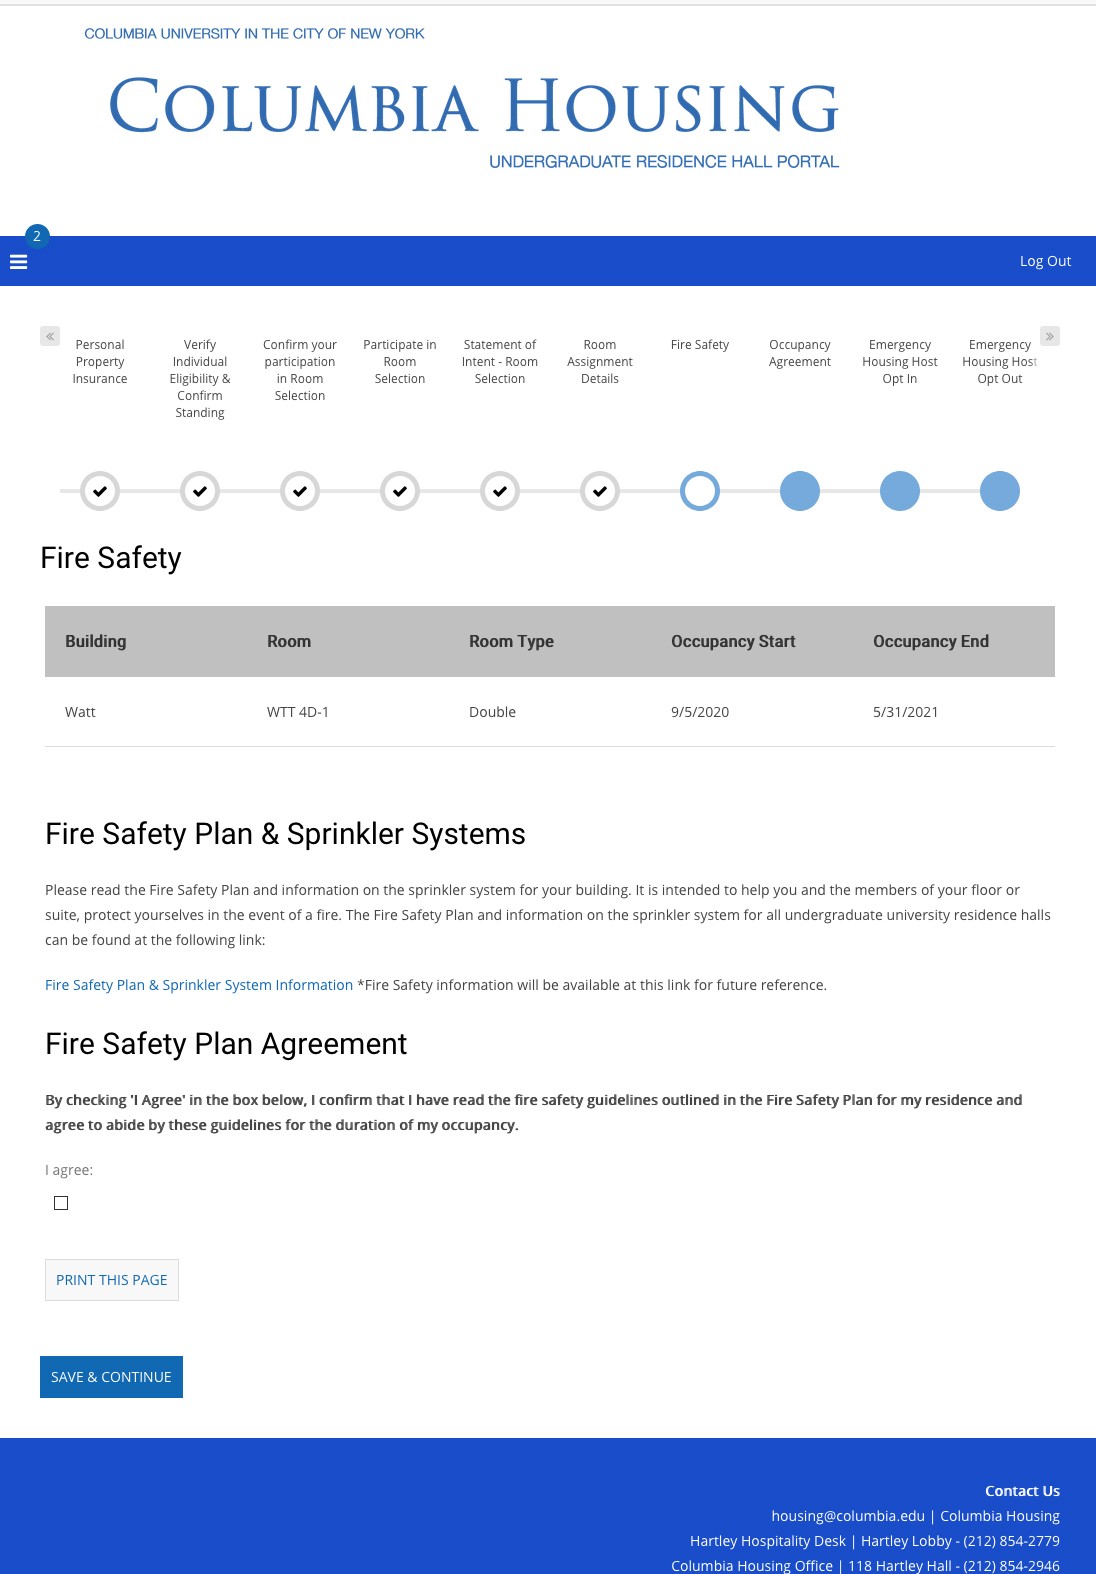
Step 4: Review Fire Safety Information
The next screen provides Fire Safety information related to the residence hall you have selected and asks you to confirm that you have reviewed and understand the information.
Check I Agree after reviewing the information provided. Then click Save and Continue.
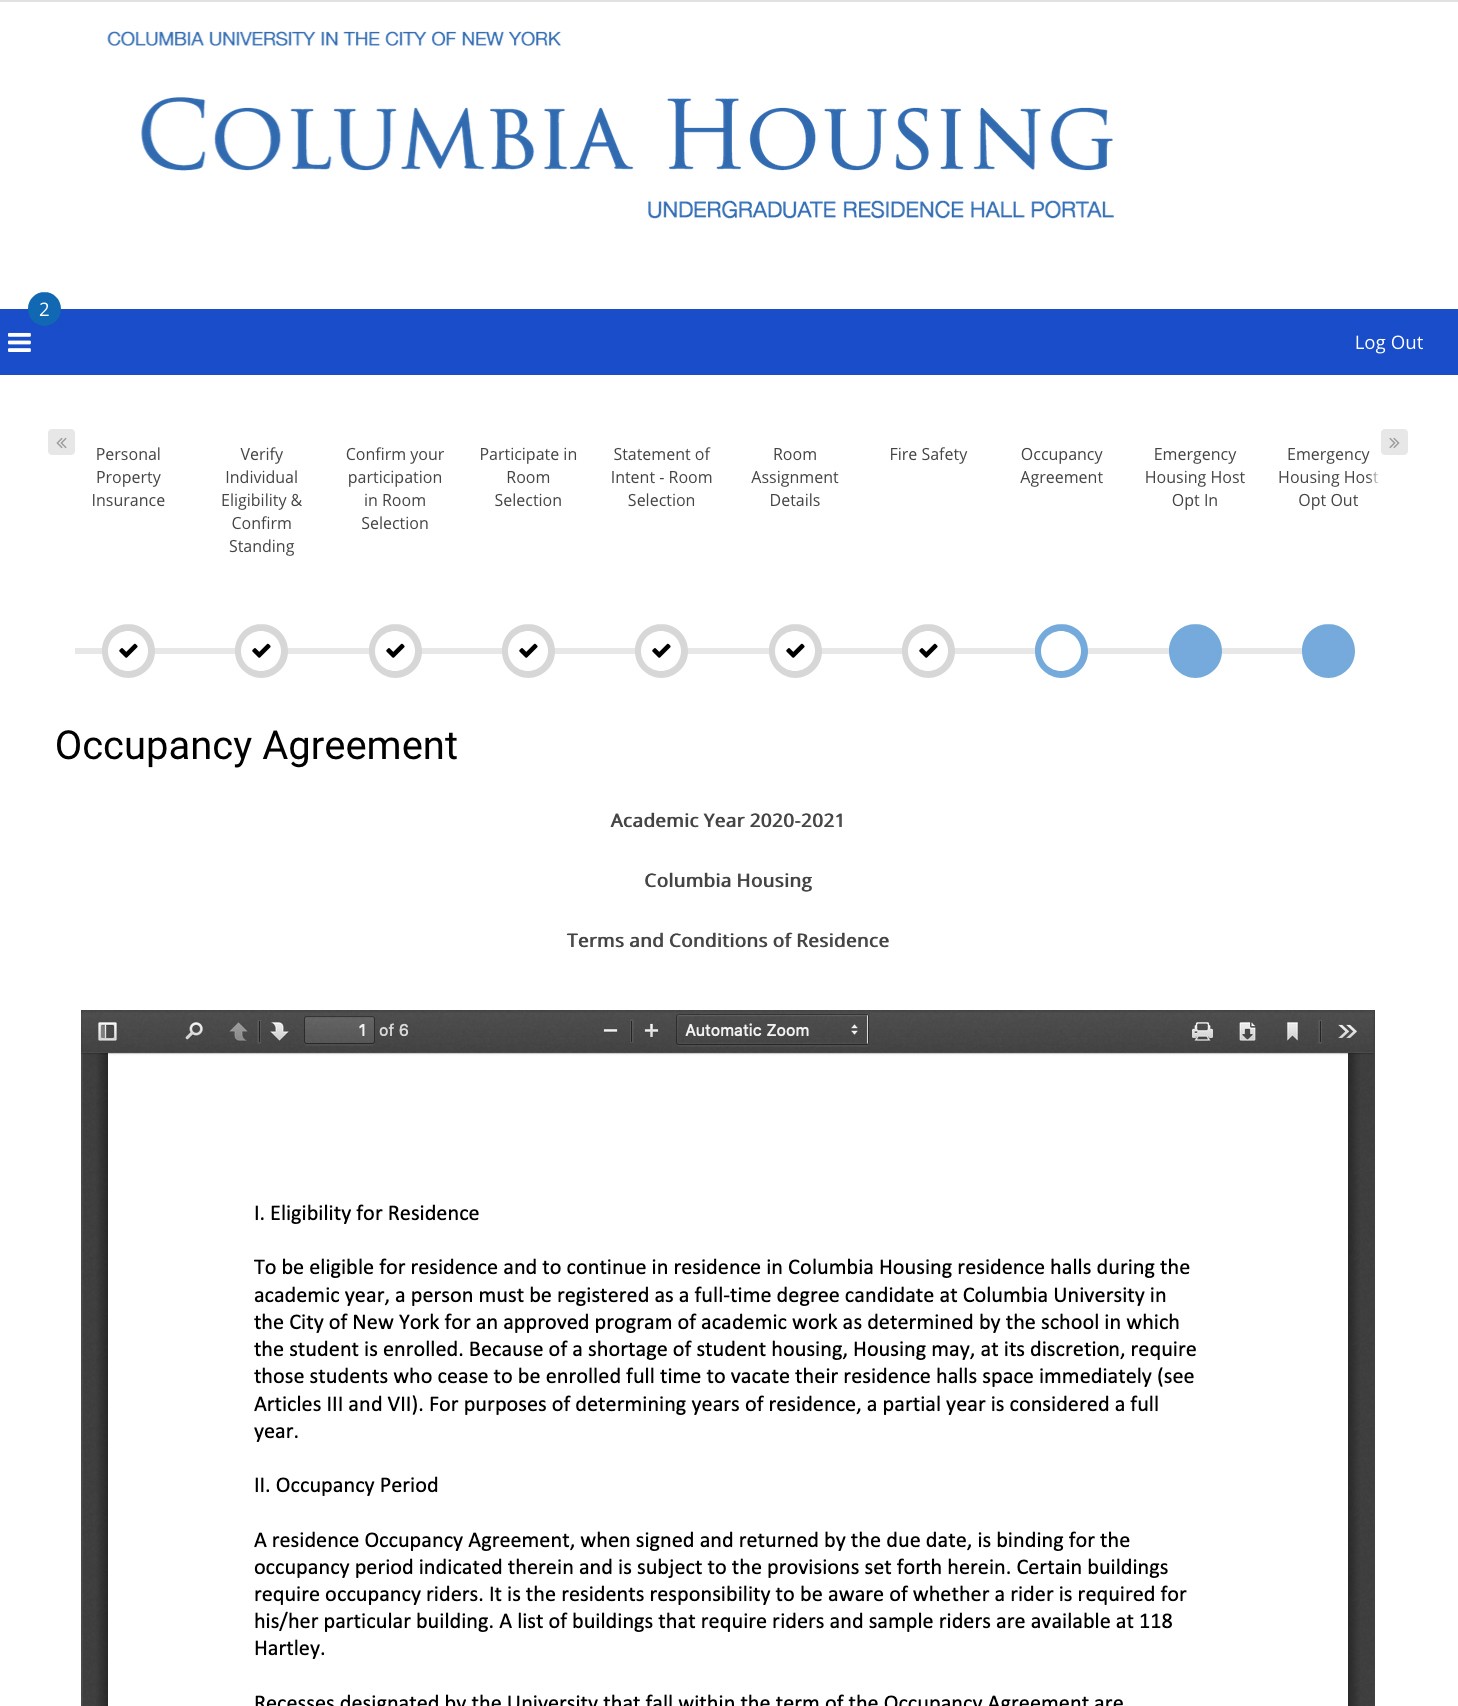
Step 5: Sign Occupancy Agreement
Next, you'll be provided with a full, printable copy of the Occupancy Agreement that must be signed for you to be eligible to live in Columbia Housing next academic year.
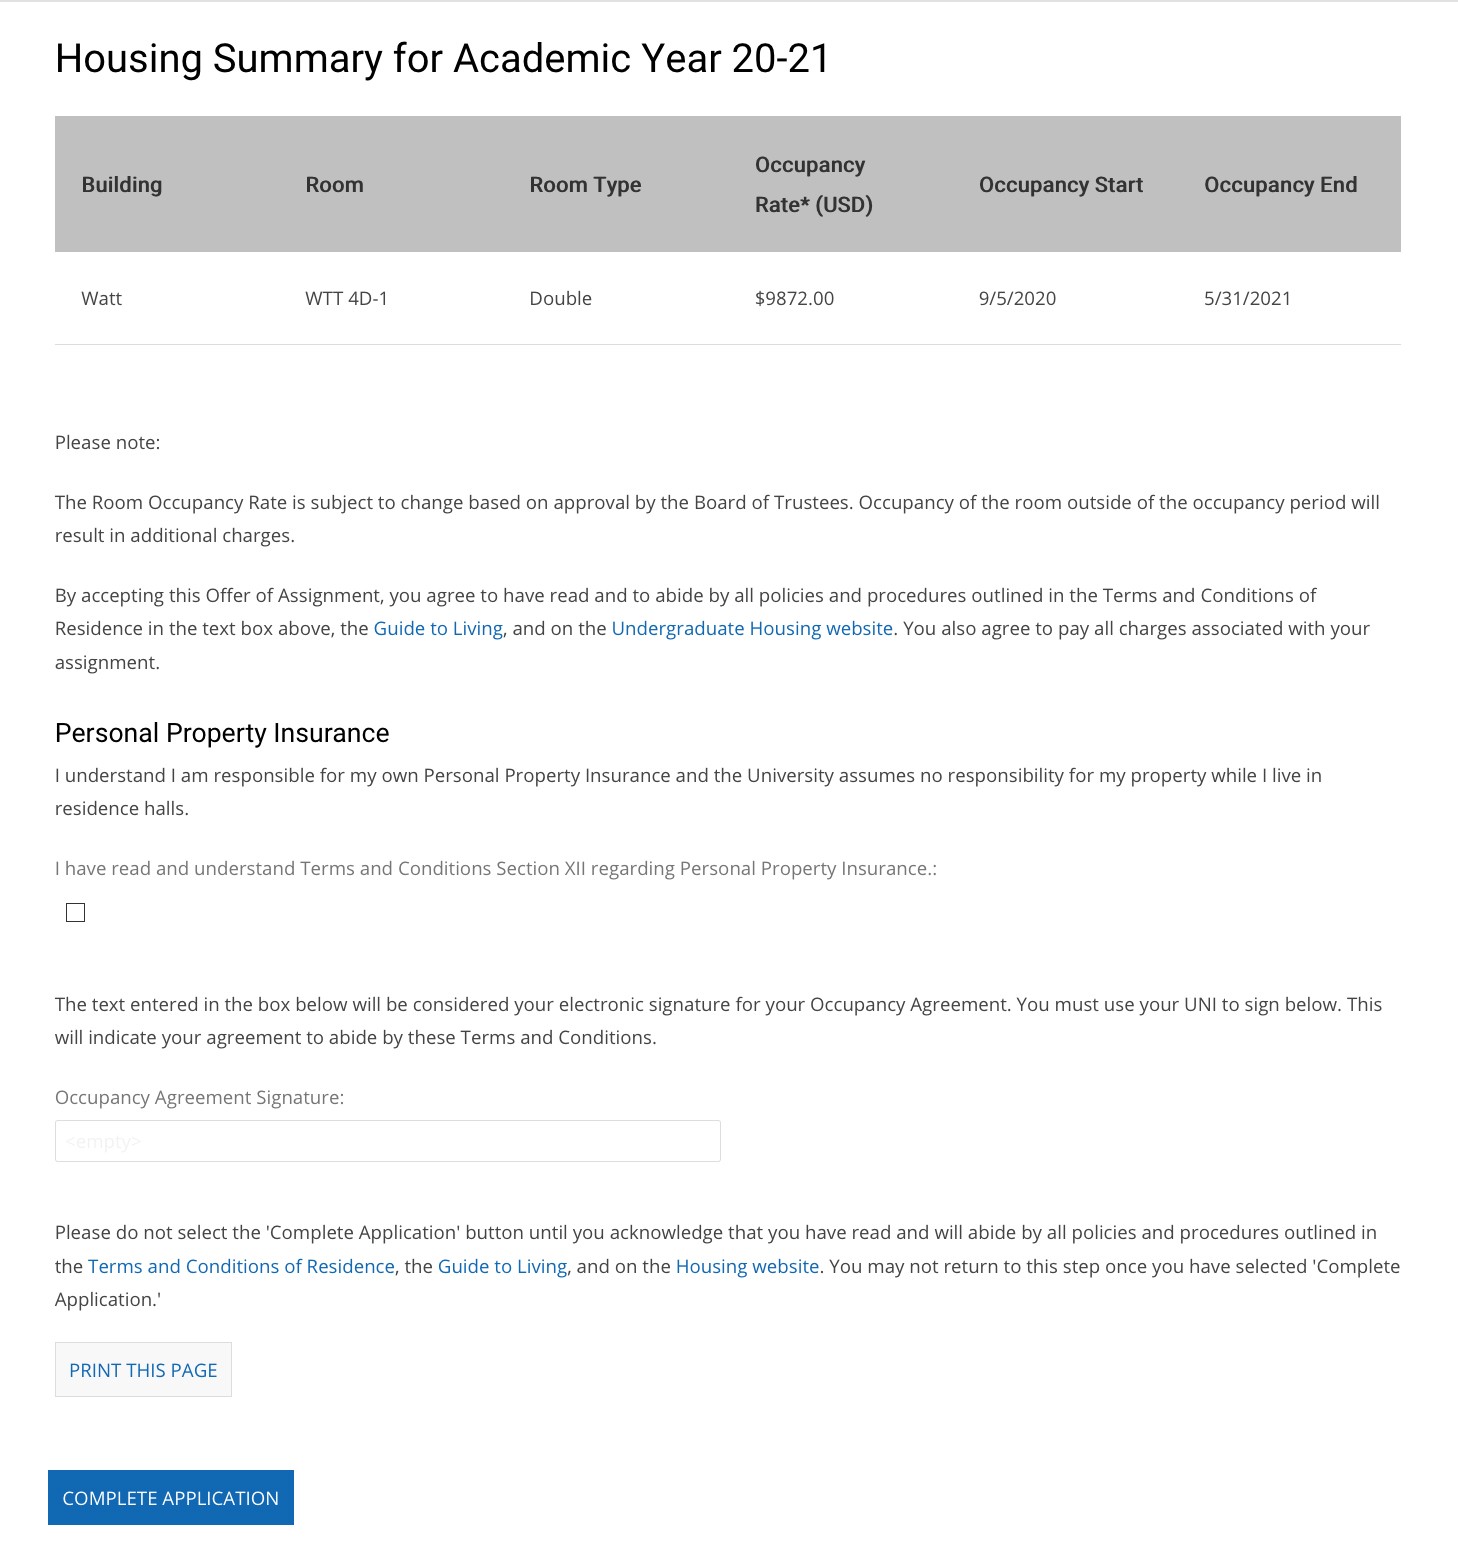
Towards the end of the Occupancy Agreement you will see your selected room listed, and a reminder about the importance of having Personal Property Insurance, as the University assumes no responsibility for your property while living in the residence halls.
The Occupancy Agreement:
And below is portion of the agreement discussing Personal Property Insurance and where you will electronically sign using your UNI.
- You must check the checkbox indicating that you have read and understand the directives in the Property Insurance section, and sign the Occupancy Agreement by typing your UNI in the provided field.
- Click Complete Application to finalize the process.
You've Successfully Completed Room Selection!
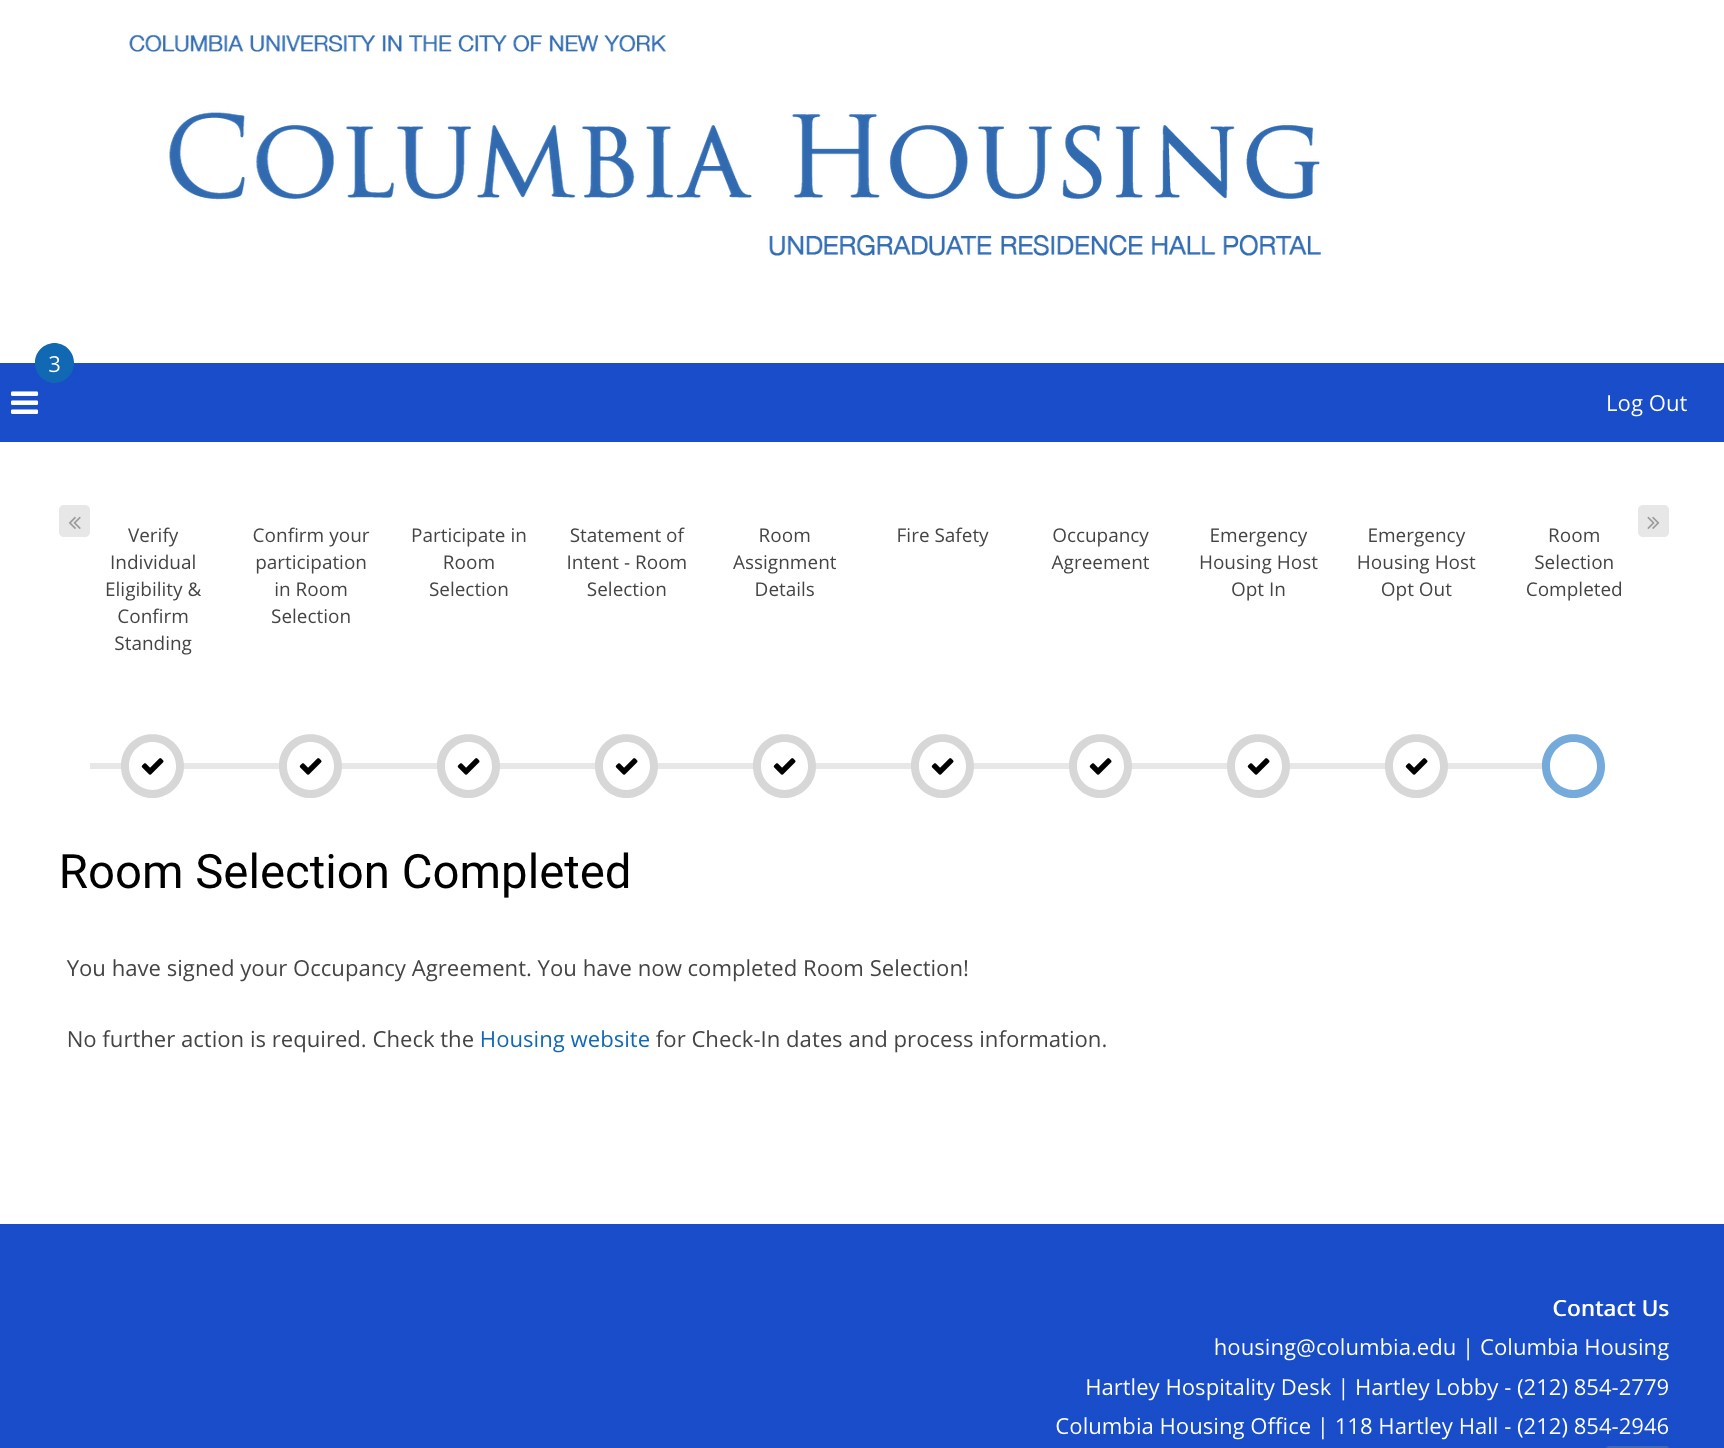
The screen below will display informing you that you have successfully completed all steps of the Room Selection Process.
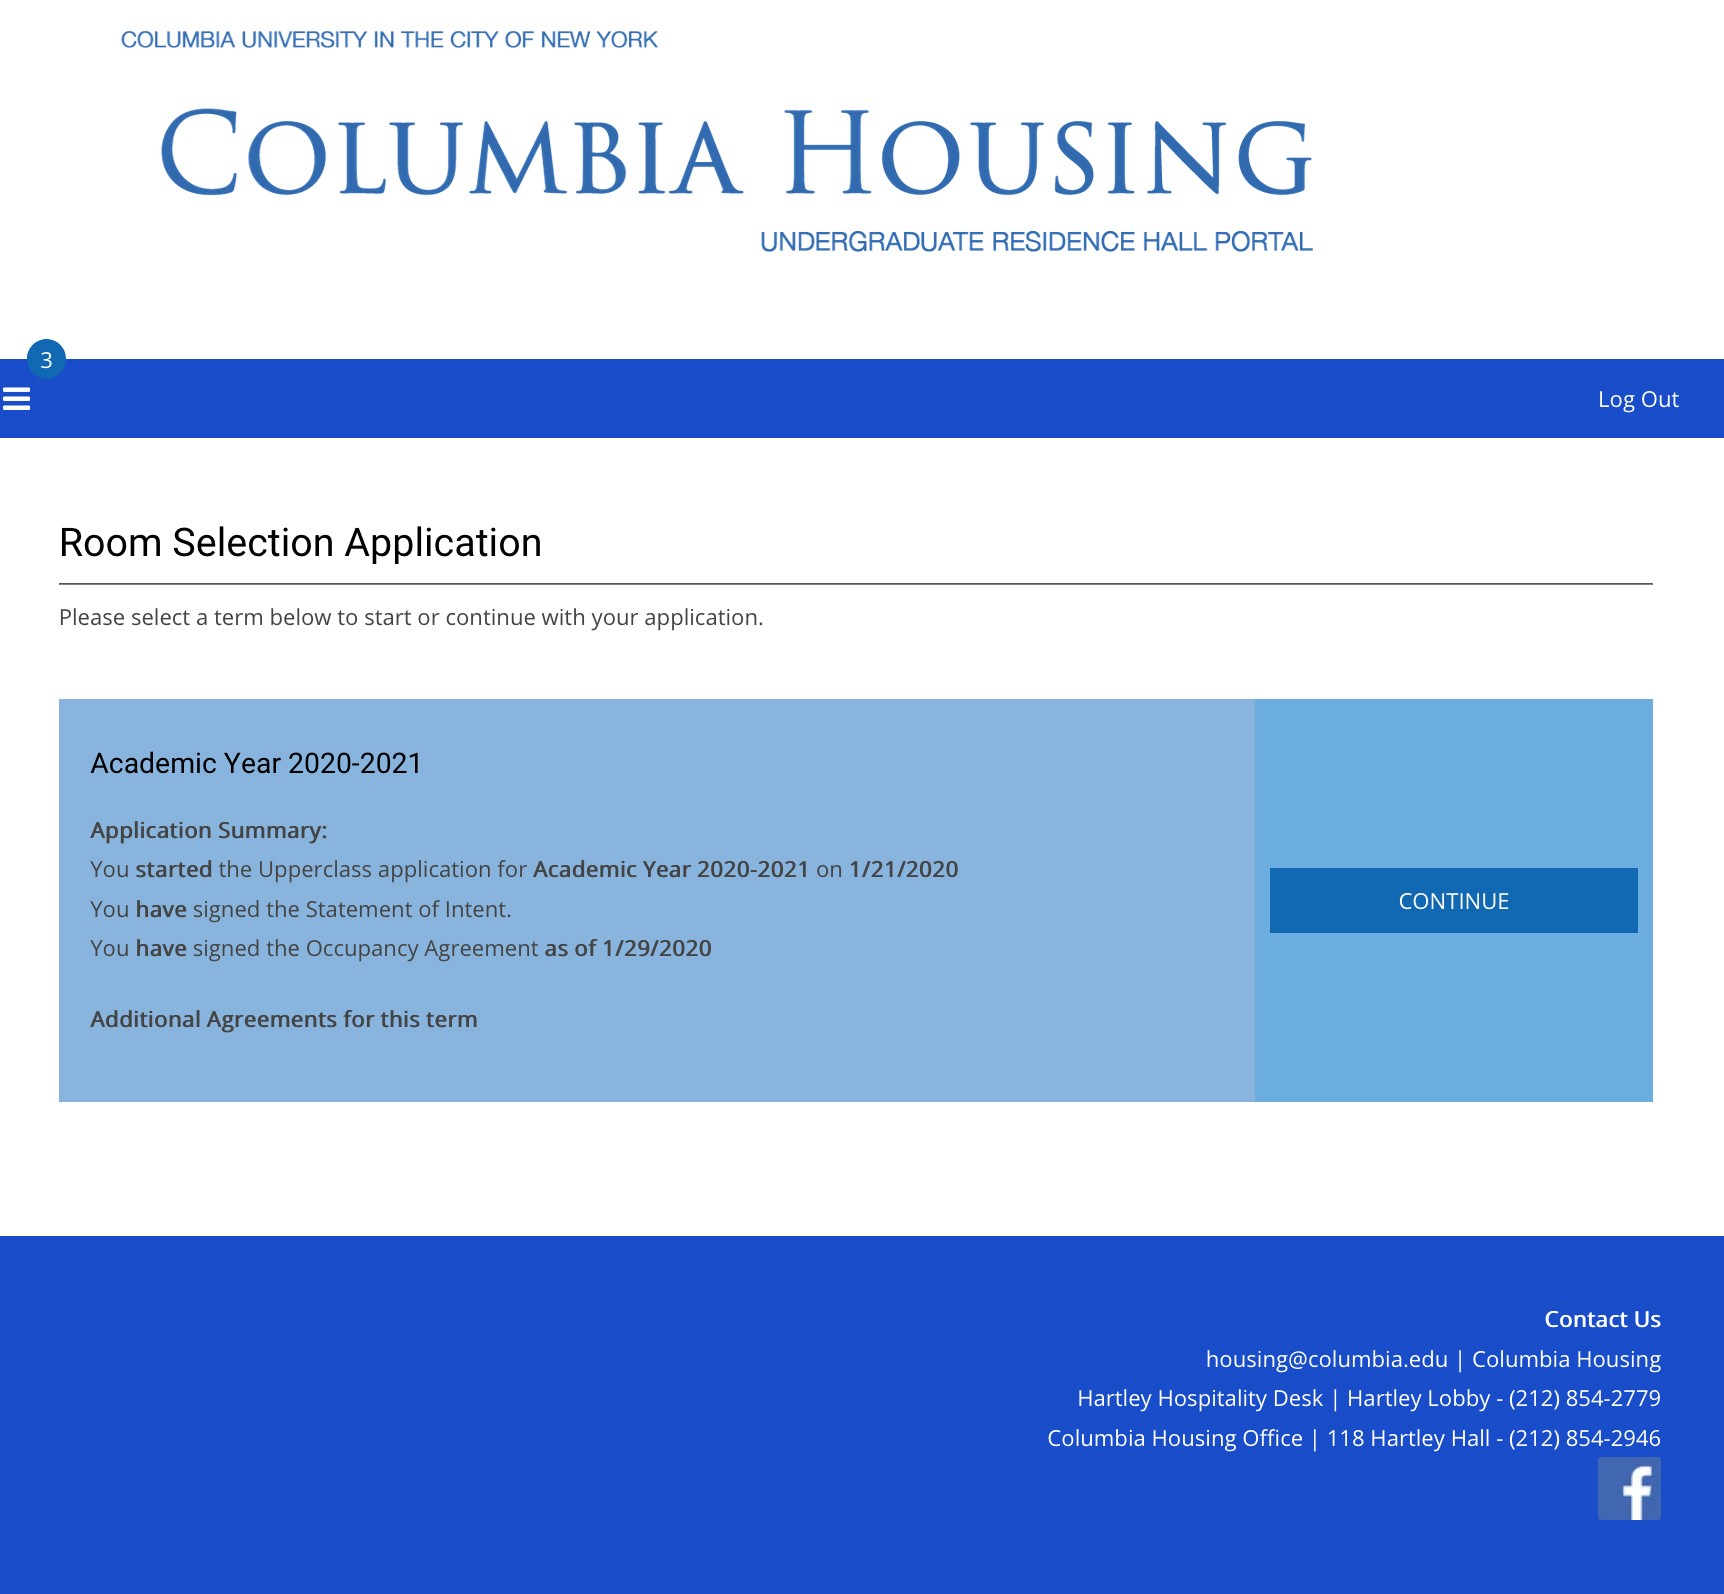
Afterwards, whenever you return to the Room Selection Application in the Housing Portal, you will see this screen, showing that you have completed all steps. Congratulations!
If you need help during Room Selection, contact the Housing team:
- Main Housing office: 212-854-2946 (Monday - Friday 9:00 - 5:00)
- Hartley Hospitality Desk: 212-854-2779 (After hours and weekends)
- [email protected]
